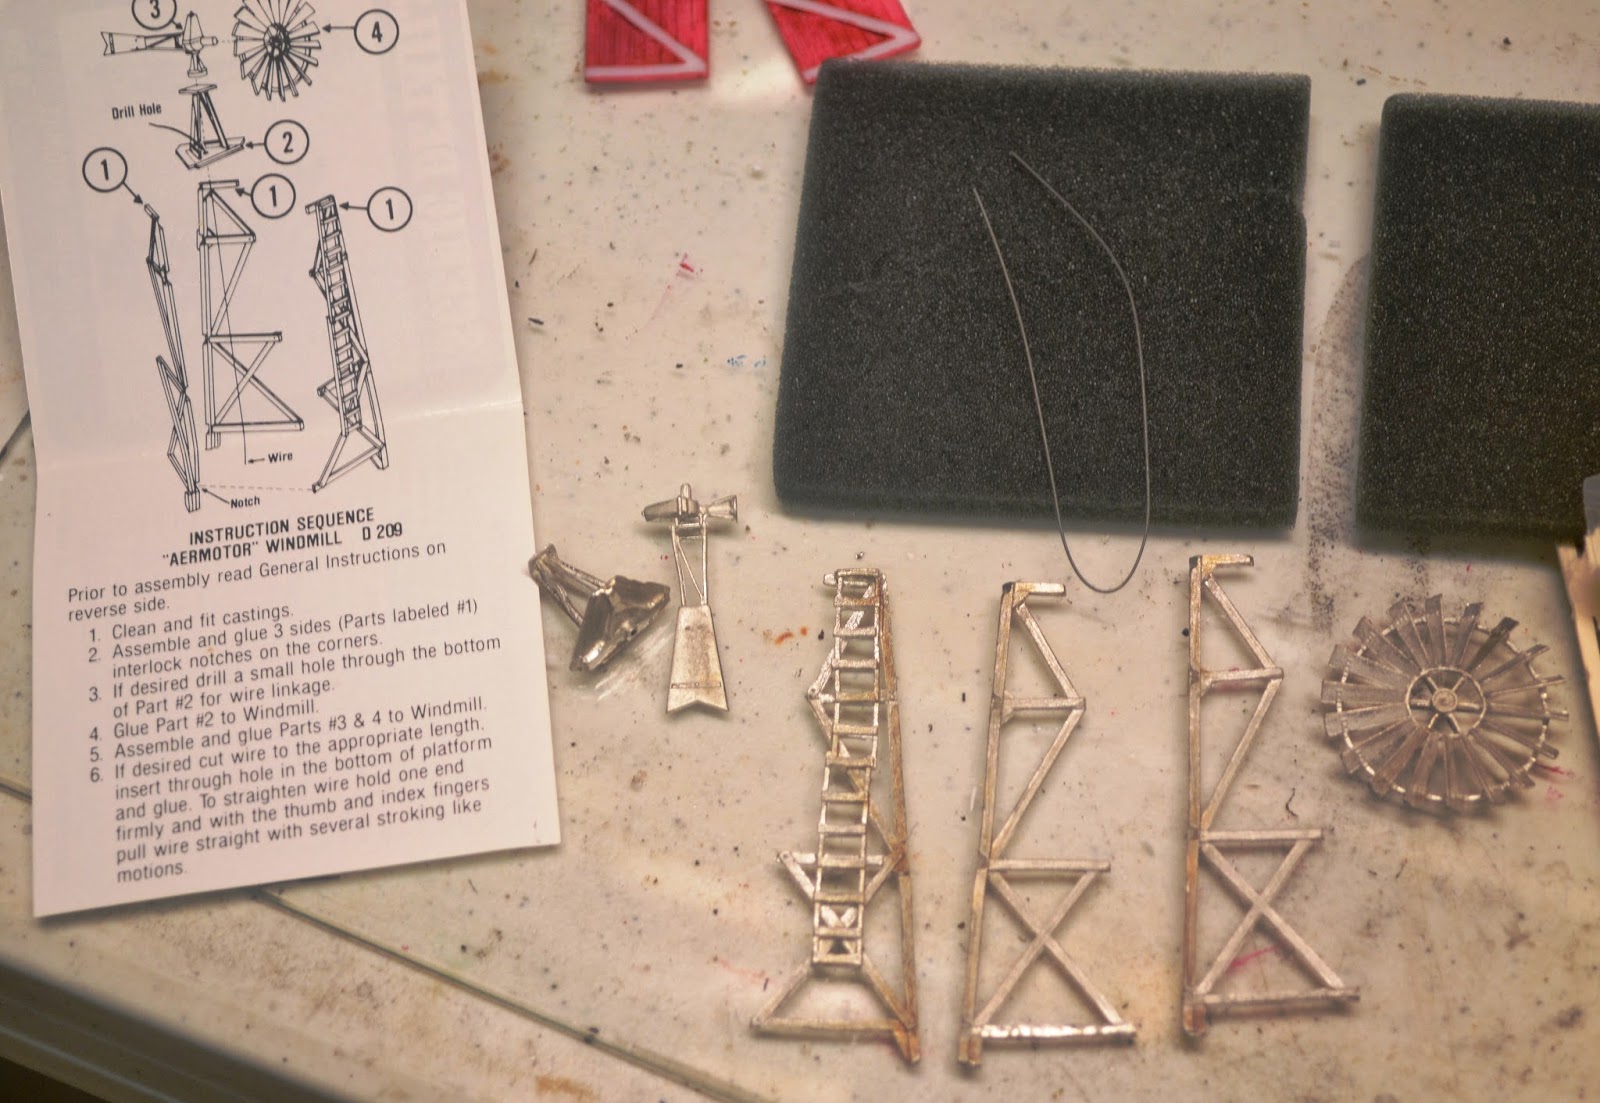
The pars that come in the package on the windmill kit. It seems line just about all the kits have some use for a piece of flexible wire. It just seems to be in all of them. After cleaning the flash from the castings, I tried to assemble the tripod that is the stand of the windmill. The first issue was that one leg, the leg with the ladder, was about 1/16" longer than the other two. )Woodland Scenics really needs to pull out the old masters and make new moulds more often.) The next issue was how to hold the three sides in position while the glue dried.

I ended up using the foam packing from the kit and cutting it to make a fixture to hold the sides in position while the epoxy set. I used JB Weld slow set epoxy for metal. IMHO, I use the original cold weld formula, http://www.jbweld.com/product/j-b-weld/. It is reinforced with metal, is magnetic, which could be an issue in some situations, an can be machined if needed. For metal projects where one wants an extremely hard bond, it is the way I go.

You can clearly see in this picture that one leg is longer than the others. I used some more JB Weld and glued a small piece of wood to the top of the structure, and when it was set, I filed it to provide a flat surface for mounting the piece that is supposed to go on top

I added a couple details, the actual pump, painted red, that I pieced together from some scraps of paper and styrene. I will eventually run a pipe from the pump to watering troughs in the hog pen.
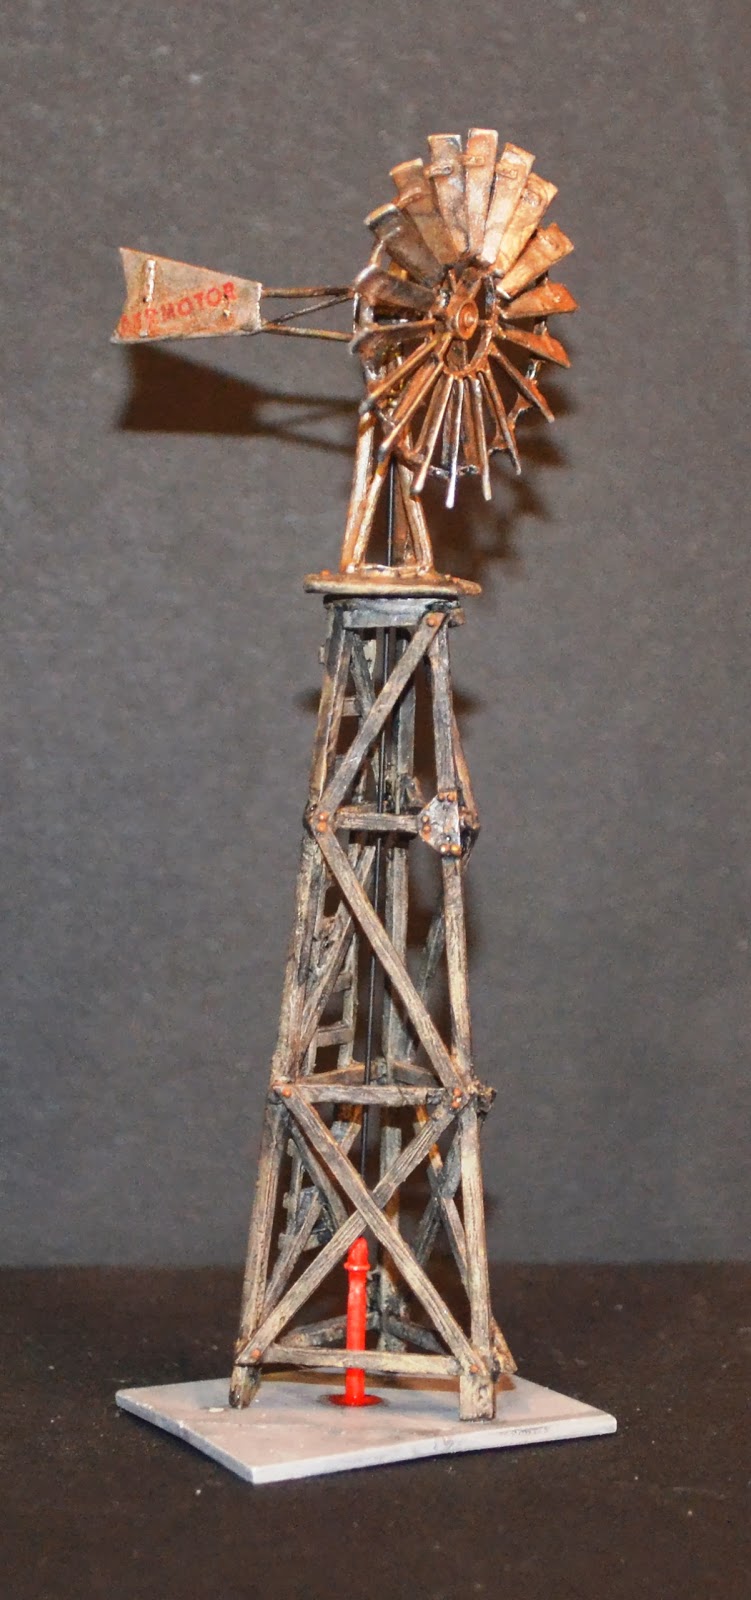
I also applied decals to the tail fin, I guess that is what you call it, with the lettering for a popular brand of windmill, Aermotor. The decals were applied one letter at a time, as they were just a letter jumble from the decal junk box.

The Tool Shed pieces from the Woodland Scenics web site.

I think I will add more green on the base to make the detail show up better.

Maybe some white dry brushing to make more of the details stand out.
For the hog farm, the last building I have planned is the corn crib, the one from Blairline, http://blairline.com/corncrib/. So I better get started on it.
Previous posts in these series"
Down on the Farm:
http://nvrr49.blogspot.com/2014/02/farrowing-barn-down-on-farm-8-3d-printed.html
Woodland Scenics:
Treehouse, Outhouse: http://nvrr49.blogspot.com/2013/12/treehouse-outhouse-woodland-scenics.html
Woodland Scenics #3: http://nvrr49.blogspot.com/2014/01/docs-office-shoe-repair-couple-of.html
No comments:
Post a Comment