Friday, December 23, 2016

2016 Turkey Creek Build Challenge entry, Larry & Steve's Quality Automotive, part 2


In case you missed part 1, where I cover construction of the main building, 2016-turkey-creek-build-challenge-entry

A lot of scenic items and the small building were from the Woodland Scenics Smiley's Tow Service.
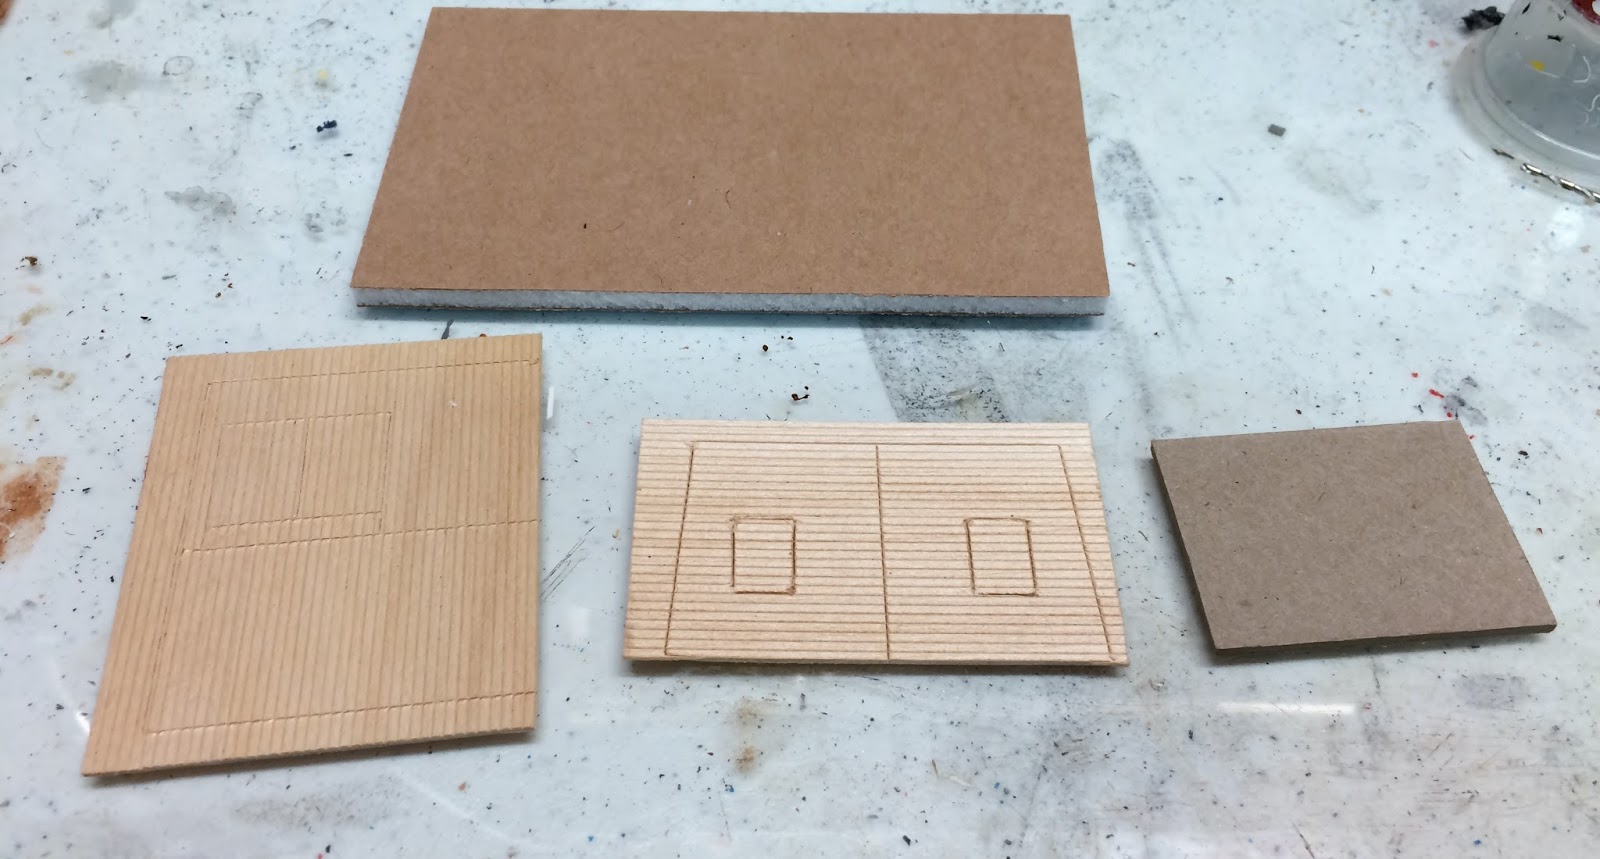
The parts in the Woodland Scenics kit.

 The diorama is about 12" square. The posts were cut from dowell stock, and the horizontal boards are from the Woodland Scenics kit.  I drilled holes of each post, to they are installed solid.  I used whatever I had laying around for the fence.  

 I had never used static grass before, but I was not going to spend a ton of money on a grasser.  I built mine using instructions by Ken Patterson.  Here is a link to his video, https://youtu.be/lHxDH8PyAzA

 I am not good with electronics, so if I can make one, any one can. The parts I bought to the left and the leftover parts for use someday for something to the right.

Here is the finished grasser.

Some examples of the applied grass.

I used several different brands of grass.  Whatever was available at the LHS.

I cut the souped up engines out of some old Hot Wheels I picked up at a flea market for 50 cents, and set them in the parking lot, as though they had just been delivered.

Larry and Steve are converting the old junk yard into a speed shop.  

 Larry and Steve have started fixing things up, a new sign, a new roof on the office, and replacing the bad boards in the fence.

 A view from the back, shows the patchwork fence still in place there.

 Details came from the Woodland Scenics kit, the junk box, and I 3D printed some.

 The vehicles, well the ones that are not junk, are from CMW.  The flatbed on the red truck is 3d printed, including the wood bed.  Here is a link to a blog entry I did on 3d printing with wood infused filament, 3d-printing-with-wood-wood-infused-pla


I circled a few of the items that I designed and 3D printed.  As mentioned in the previous installment, the roof ridge cap was printed in copper.  I have a couple of blog posts on 3D printing with copper, 3d-printing-in-copper part 1 and 3d-printing-in-copper-2-3-weathering.  The Chimney was also 3D printed.  In the front corner of the fence is a pile of copper scrap.  This is scrap from printing in copper, and I ground up the scrap in a blender before weathering it.  The gate, including the corrugated metal were also 3D printed.  To the left are the four truck bodies I designed and printed, including the trash truck body.  Two the car frames were printed, and the one mostly buried in grass came with the Woodland Scenics kit.  The two big wheels, pole road engine wheels, the large tires next to the trash truck, and the fan blade were also printed, as was the yellow car body in the near corner.

Sunday, December 11, 2016

2016 Turkey Creek Build Challenge entry, Larry & Steve's Quality Automotive, part 1

The main building was part of the 2016 Turkey Creek Build Challenge.  This was a kit put together by a team of Turkey Creek members, and the wood was cut out on a CriCut.


When I started writing this post, I assumed I would be able to cover this diorama in one article, but it just drug on too long, so there will be two entries, one on the main building, and one on the rest of the diorama.

The plans, as seen above, and below, were drawn by a Turkey Creek member.  All the parts are shown above, including the Grandt Line windows.

A close up of the plans (as if you did not know that).  I changed the kit slightly, by adding a garage door on the front.

The wood cut on the CriCut is quite then, so they recommend a lot of bracing.  One cannot have too many clamps.

I weathered the outside with Alcohol and India Ink (A and I), and painted the interior with flat black.

I painted the fenestration wood color, and then slopped on some A and I, as can be seen on the items at the top of the picture.

Rather than using strip wood for the roof framing, I 3D printed the roof framing.  Above is the drawing in SketchUp.

This is the view on the computer of one side of the main roof loaded into the printer software.

A short video or the rafters being printed.

I solvent welded the two halves together with Methylene Chloride.  Since I generally print in ABS, Methylene Chloride works great.

For the stairway roof, I used cardstock, and then

covered it with roll roofing.  This roll roofing was left over from last years Turkey Creek kit.

I dabbed on some rubber cement, then brushed on some paint.  Peeling off the rubber cement, give a peeled paint look.  I dry brushed the doors and windows. 

I used real wood shingles.  The is cherry veneer, and it is available at most craft stores.  I picked this up at Jo-Ann Fabrics.

 I cut the veneer into various width strips, and glued them to black construction paper.

I then cut the rows of shingles 1/4" long.  I glued them to cardstock I attached to the rafters. 

I designed a ridge cap, and 3D printed it in Copper infused PLA. (more on Copper infused PLA can be seen at 3d-printing-in-copper and more at 3d-printing-in-copper-2-3-weathering.)  

I also used A and I to weather the shingles.  Note that I left a little gap between the shingles and let a little black show through.

Larry and Steve just bought the place, and are in the process of fixing things up, turning the salvage yard into a Hot Rod shop.

A couple new engines in the parking lot.  

A view of the finished roof.  

In a future installment, I will cover construction of the rest of diorama.  

Last years Turkey Creek build and be seen at these two links.  


Sunday, November 20, 2016

Amherst 2016, Models from clinics, plus


Closer to the 2017 show than this years show.  Yes, I am at least that far behind.

There were several clinics at this years Amherst show that had structures as part of the clinic. Basically, make and take clinics.  I did not take the clinics, but helped present them, so I made these items at home.  Obviously, having all the time I needed, and was able to add details that one would not have time to do in a two hour clinic.  The details, however, could be added after you take the building home.

First up, the Basic Wood Kit.  This was a kit cut out on a Cricut, https://shop.cricut.com/.
 The kit was supplied with all the parts shown.  A little cutting and glue, and in two hours, 

 you have a nice lineside structure.  The roofing is paper.  I tried to use only the items we would have available at the clinic.  I did cheat with the 3D printed hinges.

 This is the one I built,  There was also a second clinic offered to detail the scene and the interior.

This kit was assembled and detailed by Joe Robertson, MMR., and is, to say the least, OUTSTANDING!


Scratch Built Styrene structure
This was the project, and was supplied with sheet styrene for the roof.

Since I was doing this at home, I designed and 3D printed rafters for the main building.  I 3D printed the shed roof in copper infused PLA.

I used paper shingles I drew and printed.  The styrene was painted with a paint pen, and weathered with various markers.


Wood Bridge, scratch built
This is a great little project, and fulfills two requirements for the NMRA Master Modeler Structures Certificate.  Something other than a standard building, and it is scratch built.

The project is finished up in a couple hours and ready to install.

DPM Kit

The Woodland Scenics Modular Learning kit, Link to Learning Kit, is on of the projects during the show.  There is also a clinic on building trees and one on scenery.  These three are FREE, presented by Woodland Scenics.
There are the parts for the kit.  If you are attending the Amherst show and model in HO scale, you should take the time to take this clinic.  It is given once on Saturday and once on Sunday.  


I built mine pretty much per the instructions.  I did add the roof drains that I 3D printed.

The weathering would not be done in the clinic, but the building and roof are painted as part of the clinic.


These free clinics are given in the stadium area in the building with the Woodland Scenics booth.

The left over junk.
When we were building the wood kit at the beginning, there were leftovers.  I threw them in my suitcase, and when I ran across them many months later, I figured I would kitbash something from the leftover parts. I ended up with this octagon shaped lineside structure.

I covered making the skylights in a previous post, skylights

I designed and 3D printed the bench with details.

Lots of details can be seen through the skylights.

The shovels were also 3D printed on my home printer.  They are not really good for foreground models, but they make a good representation inside the building.


One door will open toward the track, for a speeder, and the other has a ramp for vehicles.

If you ever get a chance to attend the Amherst show, don't pass it up!  The largest model railroad show in the US,  http://www.railroadhobbyshow.com/