Friday, August 30, 2013

Log Slab siding cabin update again

Work, i.e. the real job, has been picking up, and I have been worn out in the evenings, so I have not had much time to model for the last couple weeks.  I am going to try and post a couple updates on long running projects this weekend.

I really started this project as an experiment just to see if i could get this to print and finish the ABS to look like logs.  After I was happy with that, I decided to go ahead and finish a cabin.  The idea for slab siding came from a Narrow Gauge & Short Line Gazette article in the July-August, 2008 issue.

There are many things I would do different if I was to do it over, but, at least in the short term, that ain't happening.  You can see several earlier updates on this project in both of the posts with links here.

http://nvrr49.blogspot.com/2013/05/slab-log-siding-on-cabin-3d-printed-ho.html

http://nvrr49.blogspot.com/2013/05/slab-siding-cabin-update.html

Since the last update, I have added shingles from Besttrains.com, Bollinger Edgerly Scale Trains.  They are laser cut on self adhesive paper.  I used the random width version, and they went on really nice.


The foundation is also 3d printed in a random stone pattern.  The random stone is a real pain to draw, and very time consuming, something I have only done once before, and that was on the airplane hanger, which you can see here http://nvrr49.blogspot.com/2013/07/springfield-hanger-ho-scale.html .

I still need to add a chimney, which I designed tonight, and hope to find time to print this weekend.  I also need a corner post on the porch, and maybe a step up to the porch.

A big thank you to all the people checking out my blog.  I have had over 2500 hits in August.  Hits have been doubling each of the last three months.

Next a 2-4-4-0 articulated steam logging engine, not a working model, just a display piece.

Saturday, August 24, 2013

Orange Juice stand, repurposing an bottle cap

I am not much of an orange juice drinker, but I picked up some Tropicana orange juice this past winter, and I thought the bottle lid had potential to be used for something.

The arches just begged to be used for some sort of small building.

Here is a close up of the cap with the arches blacked out with paint. 

I designed a conical roof that had the same amount of sides at the cap had arches.  I designed it as a metal roof, similar to the airplane hanger I 3d printed a few months ago.

Here are the counters ready to pint.  There is an inner counter for fixing the orange juice, an outer counter for serving the customer, and then a center island preparation area that includes two sinks and four juice machines.

This view shows the main 3d printed parts.  The little spot of white in the lower left is one of the juice machines.  The 3d printer layering on the roof, due to the angles of the roof, where, and are, very noticeable.  I sanded, filed, scraped and piled the paint on hide as much as I could. This is one of the things one must deal with when using this type of 3d printer.  Since there were so many angles, there was no way to orient this particular print job to make the layering not noticeable.

The juice machine were 3d printed, as were the faucets, except for the spout, which is a piece of wire.

I used a paper printed floor, and drew lines on the counter to denote where the entrance would be.

I did a little research, and settled on the business being an Orange Julius.  I picked a sign off the Internet, sized it, and printed it on heavy paper.  I glued the signs in place using Aleene's Tacky Glue. I use it for all kinds of things that I sure it is not supposed to be used for.

Here is a view of the finished structure.  I guess I will have to place it near the ice cream store on the layout.  


Sunday, August 11, 2013

Fire station update 1.1, interior details

I had several requests to make the "running gear rack", I wondered what it was called, available to others, which is not a problem.  It is something I designed, and printed myself, so all I had to do was figure a selling price.  I also want to make certain people understand what they are getting for their hard earned money.  With that in mind, here are some additional pictures, with measurements.

It looks like each set will be $2.00 including any taxes.  I will put them in a zip lock bag, and wrap them in bubble wrap, stick them in an envelope, and drop them in the mail.  Postage and handling $1.00 to North America (I am not in this to get rich) for how ever many you want.  If you will email me at kent.hurley AT rocketmail DOT com, and I will email you a paypal invoice.  If you want to send me a check, we can do that too, just email me.

Scale wise, these are HO scale, and, if you look at the pictures with the product still on the carrier from the print, the holes on the carrier are .10 inches, center to center.

Here is an extreme close up of the running gear rack.  In the case of this particular model, one could never get this close up view when the model is assembled. 

 Another view from a slightly different angle,

Here is a screen shot of what is being sent to the printer.  The print area is about 5" square, so I can print several of these at the same time.  As I recall, each one takes over 30 minutes to print.

If you would like to see a quick one minute video of these being printed, here is a link to the youtube video.
http://www.youtube.com/watch?v=ef06wz58oLE

Here is what it looks like when it come out of the printer.  Since every item I print is going to be painted, I print almost everything in natural ABS, which is hard to photograph.   I recommend priming before final painting, and there will be some flaws to fill or file and sand.

This is the same print, but I coated the parts with and alcohol and ink solution to show the detail better.  I will be including extra boots.  As you can clearly see, one of them came loose during the printing process, and they are small and easy to drop. Note the holes in the toes of the boots that will need filed; I just used a dab of paint.

Soooo, here is what you get, with few more boots, for your $2.00.  I will take them off the raft material, so what you see is what you get. 


Saturday, August 10, 2013

Fire Station, HO Scale Model with 3d printed details

Since I am getting a lot more hits, and a lot of new people looking at my blog, let me first give you a little background.  I do not currently have a model railroad, and basically build items to use on the Kansas City, Fort Smith and Gulf model railroad based in 1949.  Time period wise, I do cheat a little on rolling stock, when I see something I like.  Most of what I have posted this year has to do with 3d printing.  I enjoy the design and construction of these projects, and since I bought an Afinia 3d printer, my wife only sees me when she comes to the basement to see me.

If you would like to follow along, you can click on the links to the right, and then you will be notified when I make a new post.  My goal is to do a short post each week, however, lately they have been anything but short, and, therefore, I have had to space them out a little more.
    
This is a simple inexpensive plastic kit that I built with added interior details.  I have not found anything acceptable to do with the two fire trucks that were included in the kit.  I don't have a specific place in mind when it come to placing this on the eventual model railroad, but I plan on having at least a couple fire stations, with several fire trucks.

In this finished view you can see the stairs.  They are from Central Valley, and I have added scratch built railing.

In this view you can see the shelves and the fireman's fire fighting gear, including coats, pants, boots and helmets.  I designed all these interior details, and they were printed on my Afinia 3d printer.

Here is the concept drawing of the equipment wall.  I drew it full scale, then sized it to HO scale.

Here is how I broke up the drawing for printing.  By doing this, I pretty much eliminated any need for support material.  Since the printed material is ABS plastic, and solvent weldable, It was easy to assemble it.

With the upper floors removed, you can clearly see the table, shelves, and the cabinet on the back wall.  I also enclosed a small area on the back wall for a restroom area.  This would be located under the stairs.

A better view of the equipment wall with the boots on the floor, and helmets on the shelf above.

An overall view.  The interior details are meant to be general representations, as when the building is assembled, they will only be visible through windows and through doors.   When ever I take pictures of stuff, I find things I need to change.  In this case, I am going to make the helmets a brighter red.

 Opposite the equipment, I installed some narrow cabinets that I printed, just to add some interest in case there is nothing parked in the stall.

Here is a plan view of the second floor.  I designed and printed beds, night stands and a set of lockers for this floor.  I installed view blocks, a.k.a. walls, to make a couple other rooms.  The main sleeping room will have lighting, so the basic details will be somewhat visible.


Here is the plan view of the top floor.  Again, I walled off a couple rooms.  The beds on this floor are sans headboards, but otherwise the same.

Four beds requires four lockers.

After taking this picture, I realize, I need more details on the roof, bath vents, furnace vents, etc. Since roofs are so visible on model railroads, added details are a must.  I cut open the roof access door to make the stairs visible.  
The copper roof on the bell tower is painted with Sophisticated Finishes copper paint and then treated with their patina solution.  The paint has actual copper in it, so the patina is real copper patina.  A really nice, and correct effect.
The iron fence around the edge is done the same way, only using the Sophisticated Finishes steel paint and rust treatment.  The iron paint contains real iron, and when subjected to their chemical solution, it rusts.  I just dry brushed the iron paint on the railing, as I did not want it be totally rusted up. With this stuff, you can rust anything.


I am not sure which project will be my next post, but I have several going, including an up date on the slab log siding cabin with finished roof (it is not finished yet, but I hope to finish it in the next week).  I also have an orange juice stand made from an orange juice bottle cap.

Sunday, August 4, 2013

Ice Cream store made from a pill bottle

This project was inspired by an article in Railroad Model Craftsman with in the last year or so.  In the article, the author proposed using a printer paper wrap for the windows and doors, and paper to build the awnings.  I filed the article away for later use, then 3d printing became available, I decided to give it a try on this project.

This is a picture of the completed building.  This is HO scale, and the bottle measures 2-5/8" in diameter, which seems to be a standard pill bottle here in the USA.  The windows, doors and awnings are available on shapeways.com.
(
http://www.shapeways.com/model/850555/ice-cream-store-pill-bottle-parts.html?li=productBox-search)
The sign was printed on my Afinia printer, and could be customized to say just about anything.  The lettering is raised on the backing, and is 1/4" tall.

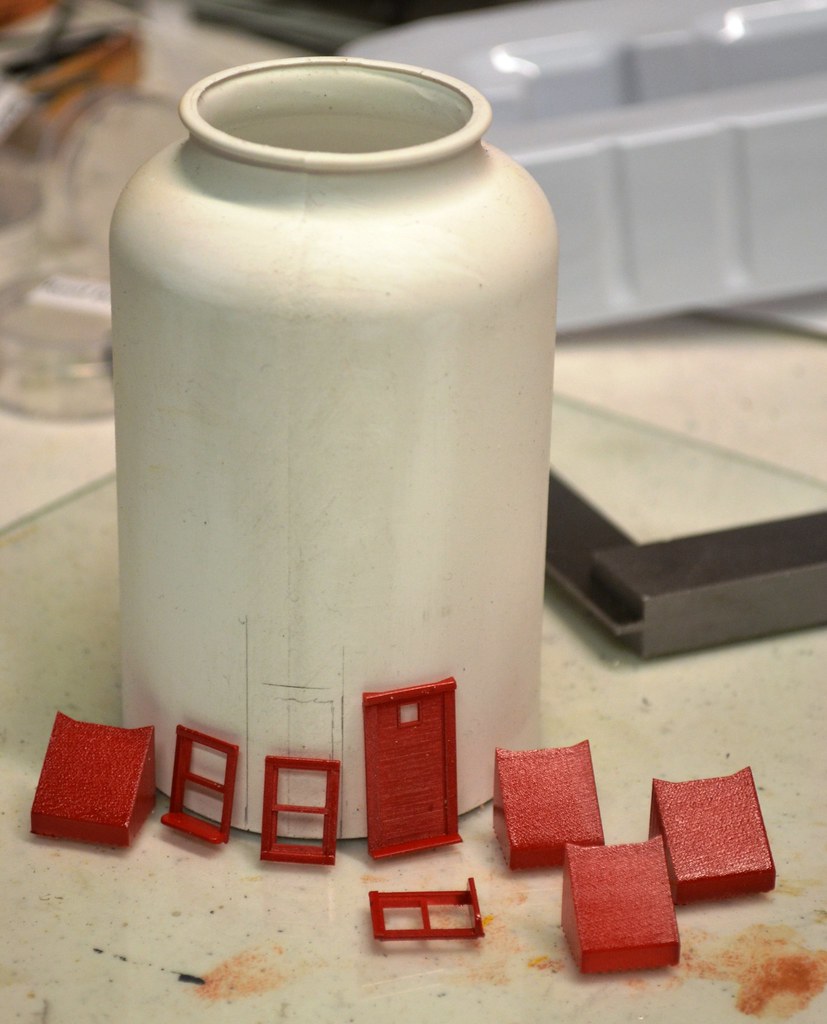
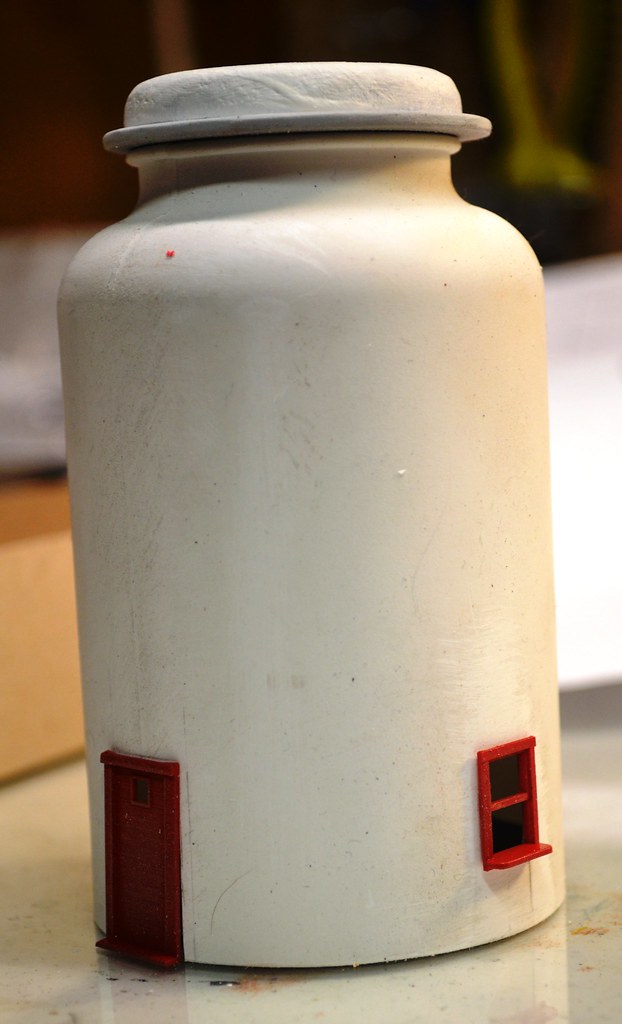
I drew the round cylinder of the bottle in SketchUp, and then started adding windows and doors.  As can be seen in the drawings, all the parts have an angled "wing" on them to conform to the curve of the bottle.  Two of the windows have a counter on them, and both are modeled in the open position.  Since the door would be used for deliveries, I modeled it as a 4' wide door, a little wider than the windows, but all the awnings are the same size.

You can see in this drawing that the outside casing on the door and the windows is angled to match the curvature of the structure.  This is a drawing of all the parts, as shown on the shapeways site. They can be purchased on the site for $17.10 plus shipping.  Here is a link to the items.  
 http://www.shapeways.com/model/850555/ice-cream-store-pill-bottle-parts.html?li=productBox-search

Here is a close up of several of the parts after a coat of primer and finish paint.  The layering from the printing process is evident, particularly on the door, but not overbearing. If the door had been oriented laying flat for printing, layering would not have been an issue...not being able to control orientation being one of the issues in dealing with shapeways.

This overall view shows the relative size of the components in relation to the overall structure...a pill bottle.

I cut the window and door holes in the bottle using a hobby knife.  The pill bottle material, in this case, seemed to be some type of polypropylene, and was very flexible.  It also proved hard to get a good paint finish on it. I used some foam core board for the interior floor, and for a second floor.  This added some strength, worked as a view block, and eliminated some of the flexibility.  The "roof" was made from a piece of styrene and a piece of wood.

I painted the inside of the awning white, but that is virtually impossible to see unless you stand on your head to look at them.  I glued the pieces in place with CA.

In this upper angle view, you get a good view of the sign.  This was printed on my Afinia printer, and should anyone want one, just send me a personal message, or leave a comment with your contact email.  There were a lot of surface issues that needed to be filled, but a little painted dobbed on, the it was all good.  If I had to do it over again, I would probably make the letters white, with the sign red.