Since I am getting a lot more hits, and a lot of new people looking at my blog, let me first give you a little background. I do not currently have a model railroad, and basically build items to use on the Kansas City, Fort Smith and Gulf model railroad based in 1949. Time period wise, I do cheat a little on rolling stock, when I see something I like. Most of what I have posted this year has to do with 3d printing. I enjoy the design and construction of these projects, and since I bought an Afinia 3d printer, my wife only sees me when she comes to the basement to see me.
If you would like to follow along, you can click on the links to the right, and then you will be notified when I make a new post. My goal is to do a short post each week, however, lately they have been anything but short, and, therefore, I have had to space them out a little more.

This is a simple inexpensive plastic kit that I built with added interior details. I have not found anything acceptable to do with the two fire trucks that were included in the kit. I don't have a specific place in mind when it come to placing this on the eventual model railroad, but I plan on having at least a couple fire stations, with several fire trucks.

In this finished view you can see the stairs. They are from Central Valley, and I have added scratch built railing.


Here is the concept drawing of the equipment wall. I drew it full scale, then sized it to HO scale.

Here is how I broke up the drawing for printing. By doing this, I pretty much eliminated any need for support material. Since the printed material is ABS plastic, and solvent weldable, It was easy to assemble it.

With the upper floors removed, you can clearly see the table, shelves, and the cabinet on the back wall. I also enclosed a small area on the back wall for a restroom area. This would be located under the stairs.


An overall view. The interior details are meant to be general representations, as when the building is assembled, they will only be visible through windows and through doors. When ever I take pictures of stuff, I find things I need to change. In this case, I am going to make the helmets a brighter red.

Opposite the equipment, I installed some narrow cabinets that I printed, just to add some interest in case there is nothing parked in the stall.

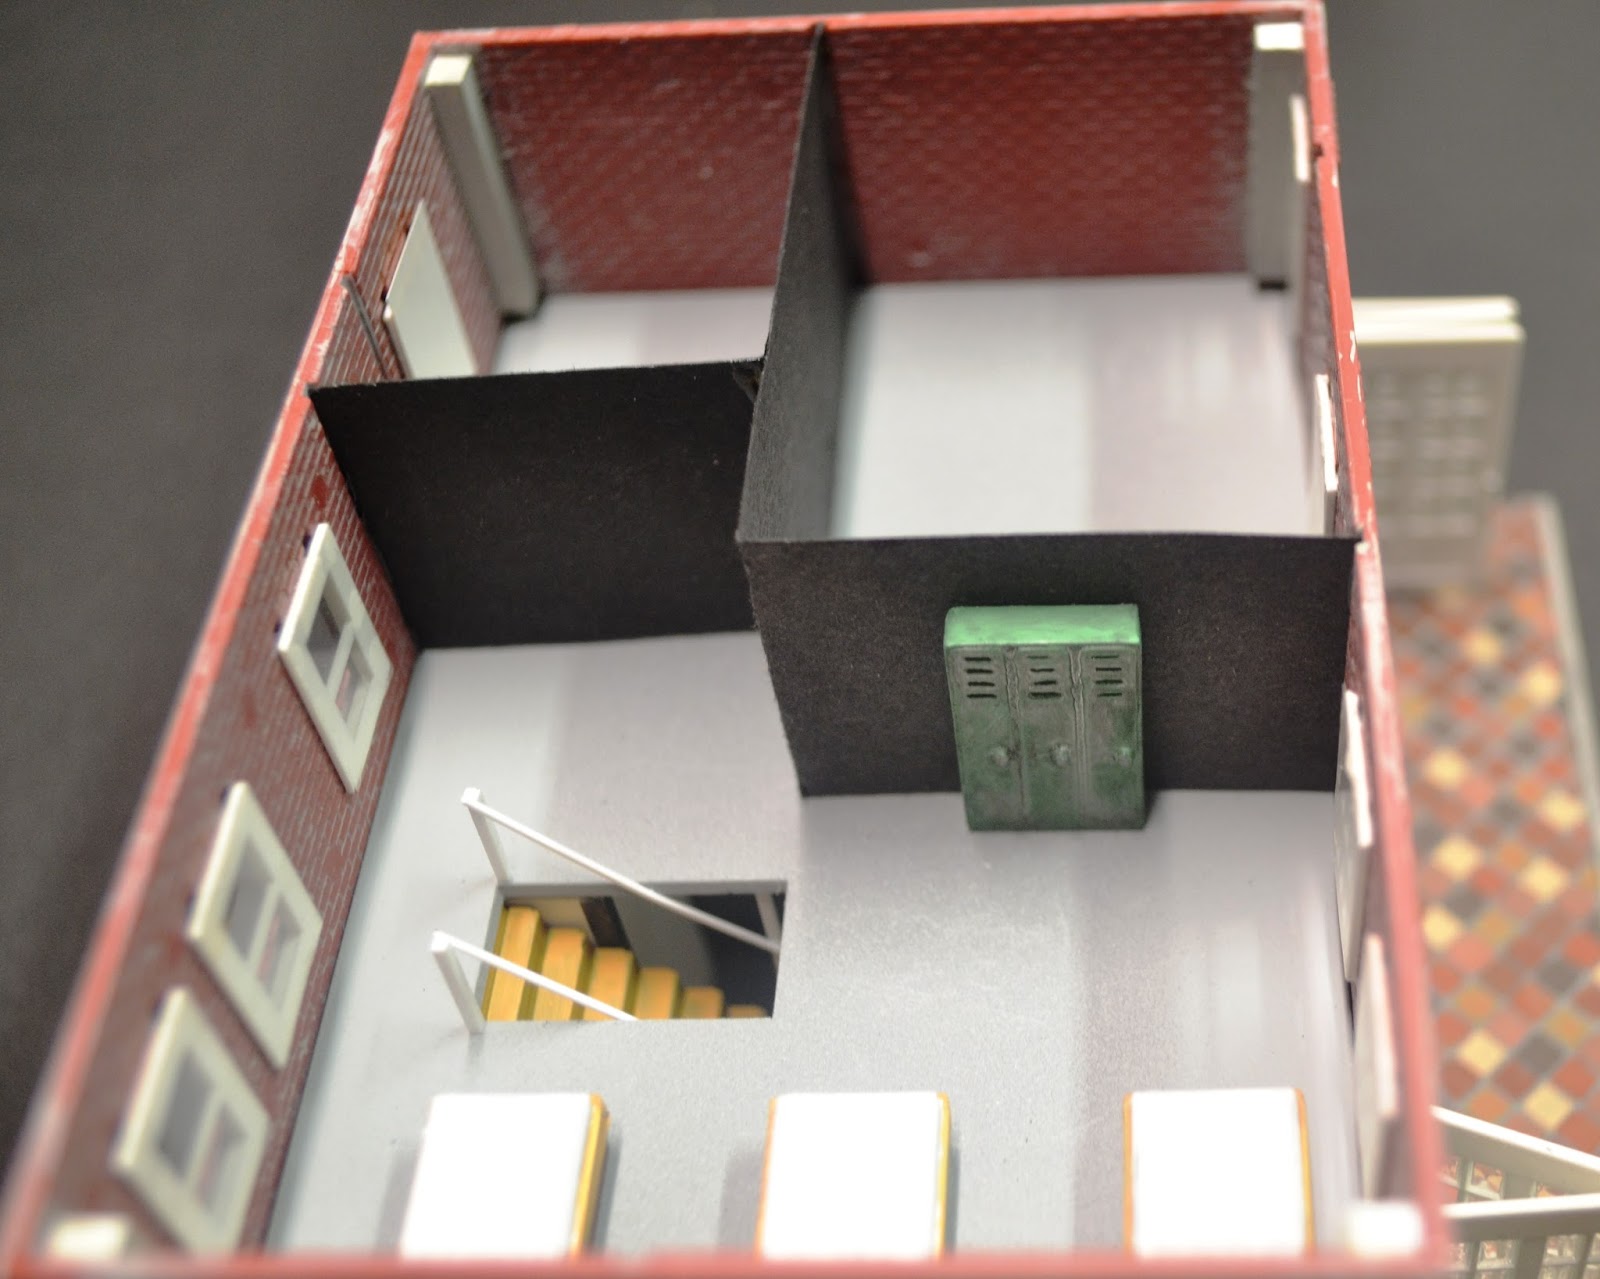
Here is a plan view of the second floor. I designed and printed beds, night stands and a set of lockers for this floor. I installed view blocks, a.k.a. walls, to make a couple other rooms. The main sleeping room will have lighting, so the basic details will be somewhat visible.


Here is the plan view of the top floor. Again, I walled off a couple rooms. The beds on this floor are sans headboards, but otherwise the same.

Four beds requires four lockers.

After taking this picture, I realize, I need more details on the roof, bath vents, furnace vents, etc. Since roofs are so visible on model railroads, added details are a must. I cut open the roof access door to make the stairs visible.
The copper roof on the bell tower is painted with Sophisticated Finishes copper paint and then treated with their patina solution. The paint has actual copper in it, so the patina is real copper patina. A really nice, and correct effect.
The iron fence around the edge is done the same way, only using the Sophisticated Finishes steel paint and rust treatment. The iron paint contains real iron, and when subjected to their chemical solution, it rusts. I just dry brushed the iron paint on the railing, as I did not want it be totally rusted up. With this stuff, you can rust anything.

I am not sure which project will be my next post, but I have several going, including an up date on the slab log siding cabin with finished roof (it is not finished yet, but I hope to finish it in the next week). I also have an orange juice stand made from an orange juice bottle cap.
No comments:
Post a Comment