Wow, I am getting way behind on my posts.
This is one of many items I thought I would print at shapeways, then I checked the cost, and said no. But, when I got a 3d printer, the cost went back down, and I have now designed several different types or styles. This is exactly why I wanted a 3d printer to use in model railroading. Structures and larger parts are quite economical.
 |
| This is an overview of the stairs I have printed so far. Some of these have a few parts added, and all have either primer or an alcohol and ink wash on them to show the details. |
 |
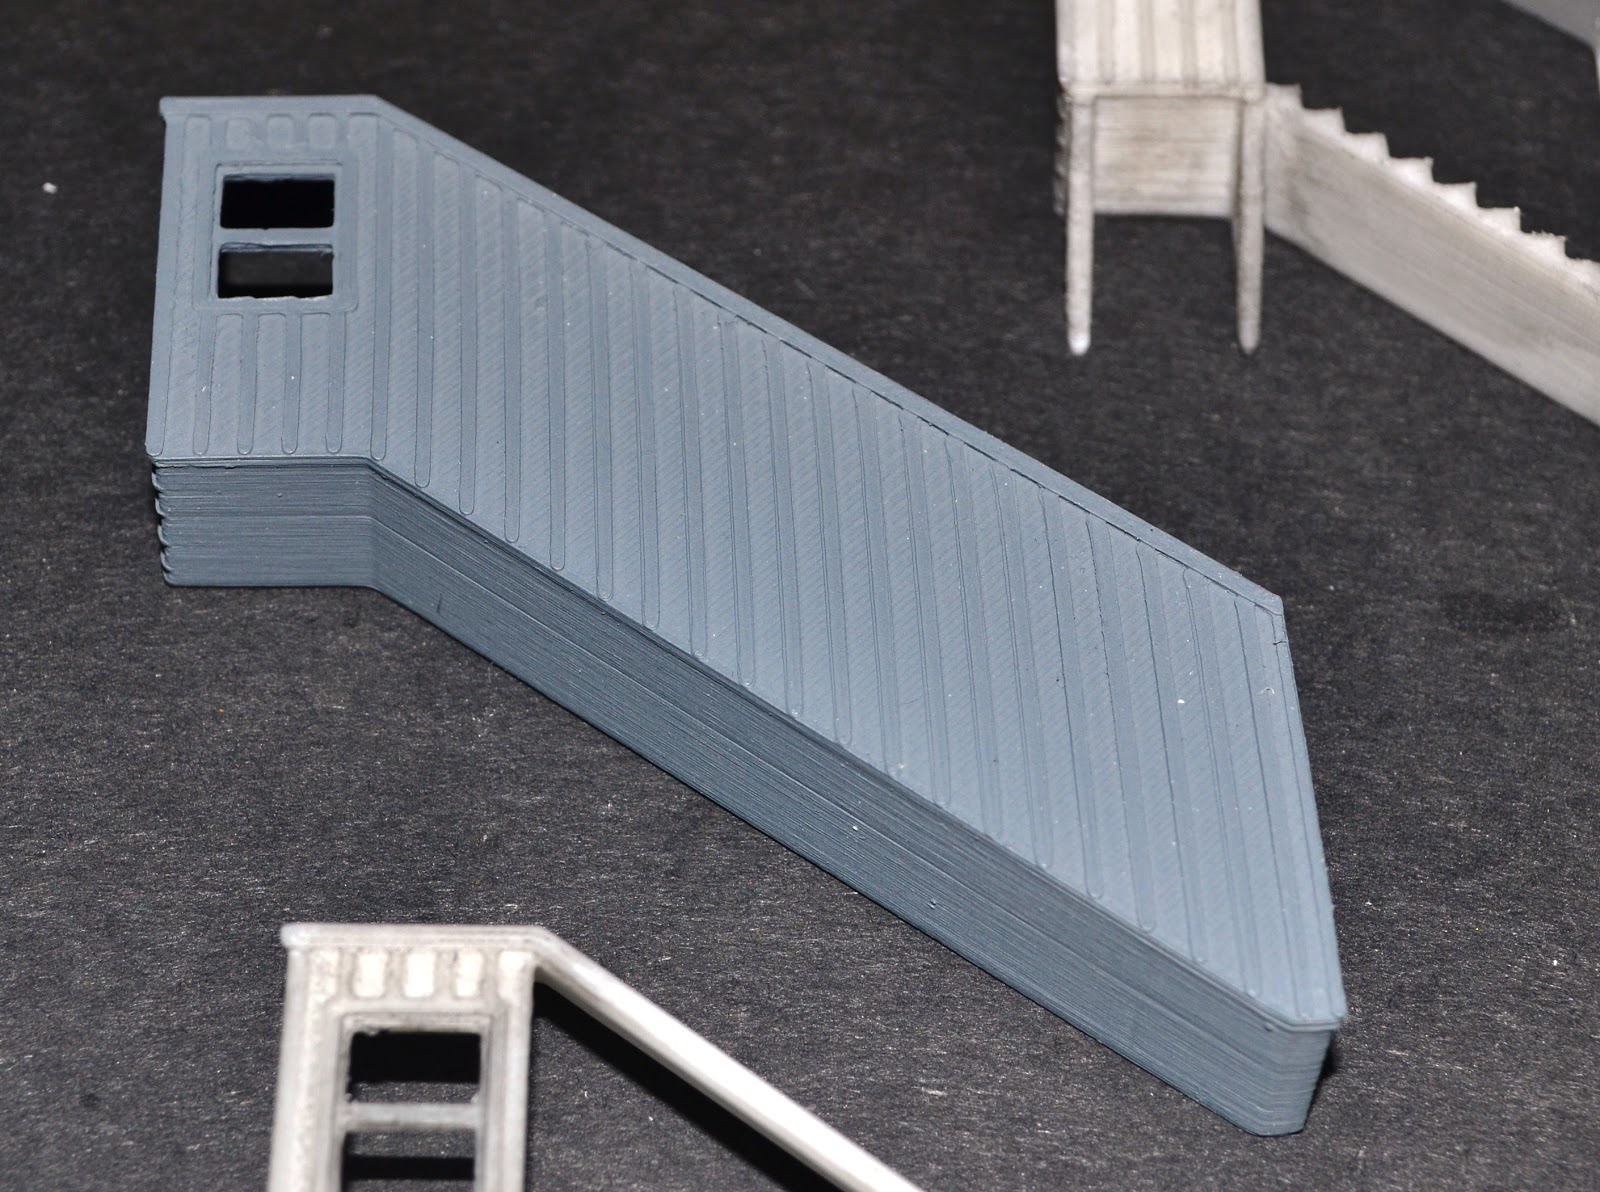
| This what the stairs look like as they come off the printer, except the styrene uprights were added at this time to give support to the structure as it is removed from the printing platform, and as the raft is removed. The raft is the plastic extruded under the part that adheres it to the printer base plate. Also in this view, you can see the support material on the near end. I looks like crap, but is will peel off easily, as it is only there to provide support for the battens that were printed horizontally on this side/ |
 |
| Viewing from this end, we can see the support material that holds up the window wall. This will also have to be removed, but being a small area, it is usually easy to do. |
 |
| Here is a totally enclosed stairway, which is my favorite. |
 |
| The only issue with this print is the amount of support material that need to be removed. From this view, you can imagine the amount of material that it took to support the wall being formed. |
 |
| It really paints up well, and with a little touch up will fit many a structure on just about any era model railroad. |
 |
| On the inside, however, you can see the damage I cause when I removed the support material. Since it is up inside the piece, no one will ever see it, but still is can be an issue. I have done some web research on this problem, and one suggestion was to pause the print once the support is built, but before the final part starts to print. You have to be watching really careful to catch it at the right moment, and know how many layers of raft are put down on top of the support material before the final object starts to print, BUT if you catch is at that moment, pause it, spit on your finger (no, I am not kidding), wipe the spit on the raft, and continue the print, the raft peels of MUCH easier. Sounds kind of stupid, but I have tried it several times now, and it works. |
 |
The vertical and angled pieces are styrene, solvent welded to the ABS that was printed. I add these before the part is removed from the rafts, as it makes the part more stable, since without these pieces, the roof and stairs are only connected at one end.
I am working on a three building background diorama for a build contest at kitforums.com, and I have several other projects that I should be posting some pictures in the next week. I also have three clinics on 3d printing I need to put together for the Mid-Continent Region of the NMRA that is coming up in June. More on model railroading and related 3d printing soon. |


No comments:
Post a Comment