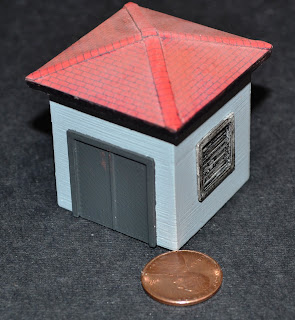
First off, I am part owner of a Afinia H Series 3D Printer. I went in on it for multiple reasons, which I will list here. I am not a writer, more of a list maker....
1. We chose this model/manufacturer based mostly on the review in Make Magazine. They review about all the 3D printers under in the personal printer price range. The Afinia was the run away winner in most categories. In particular, we did not want to buy a kit, and have to assemble it. I had this unpacked, calibrated and printing in about an hour and a half. We bought it direct from Afinia, at afinia.com.
2. Although as you can see from my previous posts, I could just send everything I design to a third party printer like shapeways, and have them print everything, but the cost of larger items was more than I would be willing to risk. I say risk, cause so often, things do not print the way you think they are going to, and your money is wasted. Yes, you always learn from it, but the part is not usable.
3. With the Afina printer, the detail/fineness of the printed items is about the same as shapeways detail material, and less than a tenth the cost. Plus I don't wait weeks to see if the item printed correctly; I get near immediate feedback.
4. I really like the design process, and having a way to print larger items at a reasonable cost, let me design more stuff.
I looked on line for a good video of an Afinia printer at work, but did not see anything I liked, so I am going to try and shoot my own. Maybe this weekend.
I describe the printer as squeezing out tooth paste to make an item. The tooth past must have support, and the software with the printer creates the support for the item that is uploaded in to their program. In the case of the printer here, the tooth paste is ABS plastic, and it is being heated to over 250 degrees Celsius. That also limits some of the things that can be done.
Here is a drag line bucket that I have printed in two different sizes. You can see the support material, as in this case, it all came off in one piece. Depending on the contact points, the support material my have to be cut off in many pieces.
 |
| The smaller bucket, after painting with primer, setting on the support material from the print. |
 |
| The car is HO scale |
I liken it to cleaning up a metal casting, only since it is plastic, you can use a knife. The smaller bucket took about an hour to print, and the large one, about an hour and forty minutes. While they are printing, I work on other things, like this blog. I have a bunch of 5' x 5' HO scale louver wall vents printing as I write this.
I have been really impressed with what I have been able to print, particularly the small stuff. Does it have the fine detail of the FUD material from shapways? Well hell no, but it is less than a tenth the price. Here are some comparison pictures.
 |
| The blue machine was printed at shapeways, at a cost of a buck or two. The red machine was printed on my Afinia at a cost of about 8 cents. Does the blue one have better detail, you bet, but remember how small these are. |
 |
| These measure less than 3/8" across the base, so sitting in a scene, I doubt anyone would notice the difference in detail. My pocket book, however, will notice the difference. |
Note the rounded corners on everything on the surface of the Afinia printed red machine. Because the Afinia is essentially extruding hot plastic, it cannot make a sharp corner that small. Think about trying to make a sharp corner squeezing tooth paste out of a tube.
 |
| The desks on each end are items printed a shapeways, and the two in the middle were printed on the Afinia. |
 |
| Sure the detail is crisper on the shapeways items, these items are about 3/4" wide, and are going to inside an HO scale structure. In many cases a block of wood would show as well. |
It would not be possible to print the roll top desk on the Afina, again because of the heat generated, it would all melt in to a blob. Keep in mind those cubbies are probably less than .02".
I really did not buy the printer to print these small items, so the fact that it will print acceptable items that small for my model railroad is a bonus.
I will try an learn how to shot and edit video this weekend and get a video up showing the printer at work. I will be posting many items I have designed and printed for my model railroad. I will also, occasionally, be showing items that I print at shapeways, because, as you will see in the coming posts, there is a long way to go with this technology, and the $100,000 printer at shapeways can do a lot of things the Afinia will not do. That said, I am having a blast learning what it will do. More to come.


