Sunday, May 10, 2015

Chain Saws, HO scale, 3d printed

I have done some chain saws previously, for my Lipasek Small engine shop, lawn-mowersmall-engne-repair-shop.  When I ran across some pictures of an old saw on the internet, I decided to draw and try to 3d print it.  The pictures, which I loaded in to SketchUp were not clear, but sometimes you have to make due.  I sized the three views I had to the same size, and started drawing.

This is the front view. 

 And a back view.


Close ups of just the drawing.

I combined the new chain saw with some of the ones I had previously draw, and also added a smaller one by scaling down one of the old drawings.


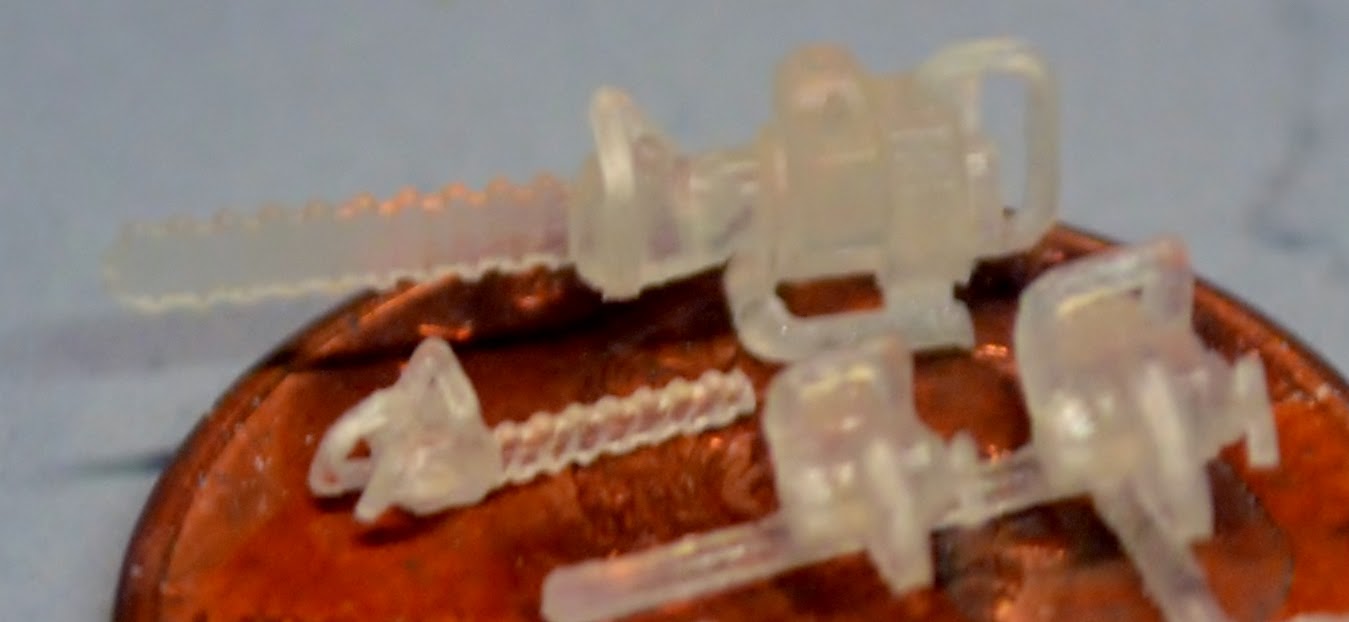
 Here are several extreme close ups of the product, as it arrived from Shapeways.  They were very clean, and I must say, every time I order from Shapeways, the product seems to get better.

Although I did not brake any of them, they are very fragile, as one might imagine. 

The small one is just crazy cute! 

 Note that in the first pictures, there were four chainsaws with blades and now there are only three...yes, I lost one somewhere along the way.

 Maybe it blew off when I was spraying with primer.

I mean they don't weigh anything.

Look, I can hold seven chainsaws on the tip of my finger.

I have since updated the file at Shapeways with some larger models of the generic chain saws.  This is the drawing of the set now available.  I have not ordered them yet, but the front two rows are the models above, and the back three are the larger models I resized and added.  Here is a link to the models on Shapeways site, chainsaws-group-2-ho-scale

Sunday, April 26, 2015

Blairline Church, Laser cut kit with 3d printed interior

I planned on posting this for Easter morning , but then I realized it was going to take much longer to write than an hour...

The classic, here are the parts picture.

Then, here are the instructions.

With pictures, and well done instructions, better than many laser kits.

I primed the wood, both sides with white primer, then I gave it a finish coat of semi-gloss white.

Another parts picture, with some assembly done.  The small brown bits in the pictures are the 3d printed interior parts.  I covered some the interior 3d printed parts in an earlier post, http://nvrr49.blogspot.com/2013/02/blairline-church.html

The interior beams and the inside of the front door are 3d printed parts, available at shapeways.  All the interior parts can be purchased from shapeways at: https://www.shapeways.com/shops/nvrr49.  The floor is a paper pattern I bought from Clever models, http://www.clevermodels.net/.  This is a download, and print on your home printer.  They have lots of great patterns to choose from.

The window are several pieces, built up to give a prototypical look.  One of the problems with laser kits is that the edges of all the wood pieces are burned black, something that can't be avoided when burning through wood.  On the windows, cleaning that off took a little extra time, and a lot of paint touch up.  Blairline includes stained glass windows, although one could make your own, as they are printed on overhead projector clear plastic.  

With the two end glued in place, I installed the ridge beam.  I notched the interior support beams, which were 3d printed, and not included with the kit, to hold the beams.


This is the drawing of all the 3d printed parts.  Not only furniture, but the inside of the doors, both front and back.

Some of the 3d printed parts are painted, the interior of the back door is still unpainted in the fore ground.

I test fit all the interior furniture on the floor.

The bell is probably my favorite piece.  Printed in FUD at Shapeways, it has to be assembled, and is quite fragile.


To me, really the coup de grace.

In this view, you can see al the 3d printed details, the roof beams, the furniture, and the interiors of both the front and back doors.

Assembled and ready for the roof and trim.  The stained glass installed.  

I installed interior lighting so that even with the roof in place, the stained glass will show.

The roof is paper supplied with the kit, and is also laser cut for easy installation.  Really a beautiful kit,

and easy to assemble.

Other posts with shapeways printed items:

Another Blairline kit I built:

Sunday, March 29, 2015

What is on the desk, April 2015

I have been sick, and injured (a fall), and working on remodeling a bathroom, so not enough modeling getting done!  Actually have not worked on the bathroom remodel in about a month due to the illness and some injured ribs.

That said, I have a lot of projects going.  Here is what is on the desk, and, hopefully, will be done some day.

 The Arch Roof building, with clear side walls.    I plan on making this in to a machine shop with complete interior.

 A test assembly.  One of the prints failed, and I made a quick diorama from the junk, a-couple-small-dioramas-using-failed-3d

The upper walls are 3d printed in clear ABS, so the trusses, also 3d printed, can be seen when back lit.  The windows and doors are from Tichy.


 If you have followed my blog for any time, you know I like the vintage kits.  This is one one I have never seen before.
 A spun aluminum tank, something you won't see today.

 The plans...

I am missing the separate water spout, and I have not found one I like yet, so this project is getting ready to move to the back burner.


I picked this up to use as a water tank for the M of W department.  It weighs a ton!  Lettering and a lot of rust and weathering to do.


Ahhhh, the hog farm.  I have been working on this, on and off, for well over a year.  I have not put it back together since I took it to the last show, as you can see, it looks like an earth quake hit.  I am not a fan of scenery, so I have been putting off finishing this for months.  I think the only thing I have to do is the hog pen, and some final weathering.  Most of the buildings I designed and 3d printed, along with several that are Woodland Scenics metal kits.  Here is a link to a complete list of the structures/blog entries so far.  down-on-farm-post-listing


A bit of a complicated 3d printed structure, but I love gas stations.  This one is based on several drawings I have, but mostly the one below.  I keep adding details, currently working on the interior.


This is a Hot Wheels Dodge Airflow tanker based on a 1939 design.  Although most Hot Wheels are about 1/64 scale, the larger items, because they are scaled to fit the packaging, sometime come out to close to HO scale.  This actually has a wheel base slightly smaller than HO scale.  I am going to have to grit blast it to get it clean enough to paint, and I am still searching for wheels and tires that look right.  
The prototype, although I won't be doing mine in Texaco.


This is one of those "I have no idea why I am doing this" projects.  It is a steam launch, scratch built, a basic shell from the junk box, styrene strip upper frame, and some 3d printed parts...so far.
Mine is freelanced from several pictures and plans.


Another of those vintage kits.  This one a flanger kitbash from Roundhouse.  Mostly painting to do, which was put off due to the winter.  

AND now, the modeling item that has been taking the most of my time of late, the Turkey Creek NMRA division modeling challenge "kit".  This a wood structure designed, cut on a Cricut and the part assembled by some of the members.  Here are some progress shots.  


 In the end, this project will warrant it's own blog entry.

There is actually more than this, but that is enough to keep me busy.  Hopefully will get the bathroom ready for the tile man this week.  

Monday, March 16, 2015

Log cabin, 3d printed

Ever since I 3d printed the slab siding cabin, I have been trying to figure out hoe to 3d print a regular log cabin.  I am not sure this qualifies as a regular cabin, but it works.  I wish the logs had come out a little rougher, so I will have to work on that.

 Just as a test, I drew up a 16' square cabin.  Having played with printing wood shingles, and pretty will failed, I decided this would be another chance to give it a try.

 I exploded the drawing for printing.  Note the roof ridge cap to the right.  I have not figured out how to get a wood shingle ridge cap to print right, so I went with a copper cap.

 Here is the roof with the top flattened to accept the copper cap.  Note that this is printed standing on one end, and then no support material is needed.

A screen shot of the cabin sitting on the build platform in the Afinia 3d printing software.

The roof was printed in this position.  Here is the first print during assembly.  


After priming, I painted the logs a light tan color, then dry brushed them with various grays and 
browns.

The roof was painted a dark gray, then dry brushed with light grays.  The roof cap was coated with Sophisticated Finishes Copper and weather with their weathering solution.  The rusty stove pipe was done the same way, but with Sophisticated Finishes Rusty Iron.

I think, when I get time, I will add some branch knobs to some of the logs.  

I have several project going, including another gas station, and machine shop, but those are on the back burner while I work on the Turkey Creek Division challenge model for the May meeting.

Other log cabin blog entries:

Logging and Lumber related entries:

Long-Bell Lumber