It was a long winter, but weat her has finally cooperated to the point I could do some painting. I have been working on some vehicles, mostly making s##t up. Since I model 1949, obviously the Matchbox Mercedes Unimog is a little to new. I picked it up for a buck, cause I thought I could use the spoke wheels and maybe the truck bed. I turned down the wheels and tires, and then added slices of plastic tube to resemble the early 1900’s era hard rubber tires. The cab is scratch built based on some old photographs. The fenders, seat, and hood are from the junk box. The head lights are sections of bras
 s tubing, again modeled after a photograph. The grill is scratch built. The Western Auto deals I printed myself. Printing decals with my ink jet printer has been a hit and miss proposition…mostly miss. The dashboard, mirror and gear shift are also scratch built. I keep finding things to change or add, like an exhaust pipe, differential and drive shaft. So I do not feel it is done yet, but I think this will look good parked in front of the Western Auto store on Main Street of the model railroad layout.
The next making s##t up project is a H ot Wheels I thought had possibilities. I am modeling two different oil companies, Gulf and Phillips 66, so I have several tankers in the works. I don’t really know what possessed me to do this one, but here it is. I had to raise up the chopped roof, get rid of the exhaust stacks, open up the fenders, and add headlights. The decals is individual lettering from the decal junk pile. I have several more making s##t up vehicles. This tanker will no doubt be unique to my HO scale railroad!

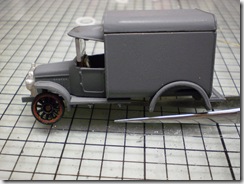
The junk box was full 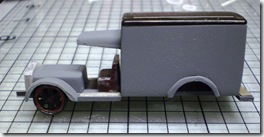 and I needed to use stuff up, so I just started building. The hold up on the other trucks is decals that I will have to make or have custom make. All are for industry and business that I plan to have on my eventual layout or at least would be in towns near by. So I felt I could justify having company vehicles in the area. Here are several I am working on. All are waiting on decals or paint, or both. Left to right, top to bottom, they will be decaled for: Fort Sm
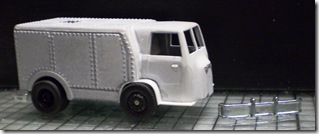 ith Rim and Bow, Junge Bakery, Otasco, and Jewel Tea. I also have a Cook Paint truck in the works. Getting the Cook Paint picture, shown below, to print on decal paper with clarity has been an issue. Realize, that to fit on the model, it will only be 1” high.




 I have several dioramas in the works, so hopefully I will get some time to get back to model railroading.


 Here are a couple before pictures. This is a Megow paper wrap car I picked up somewhere. Check ont the great detail on the truck side frames. This kit is
  probably older than me, and certainly dates to before I started model railroading. I did a little clean up and added several details. Including hand rails, basic, very basic, brake detail, A-Line stirrups, etc. I also installed
 some old metal sprung trucks I had laying around. Just cause the old truck are cool, I am keeping them in the box with the model so all the original pieces I
  have are together. I really like taking the old kits and detailing them a little. Certainly not contest quality, but an interesting piece of vintage HO model railroading.

 I scraped off the N scale details, leaving the


